
A few years ago I was looking for something new to do with my grand niece Sheena when we went to visit her in San Francisco. I am not even sure where the idea came from but I decided to take some shrinky dinks along to play with. We made a lot of projects but mostly jewelry, and we made many trips to the craft store to get more supplies. 😊
My favorite shrinky dinks are semi-transparent, one side is shiny and the other side is a matte finish. The ones I use are made by K & B Innovations, Inc and are available at Michaels. The package includes good instructions, ideas and a guide that shows you how much your piece should shrink.

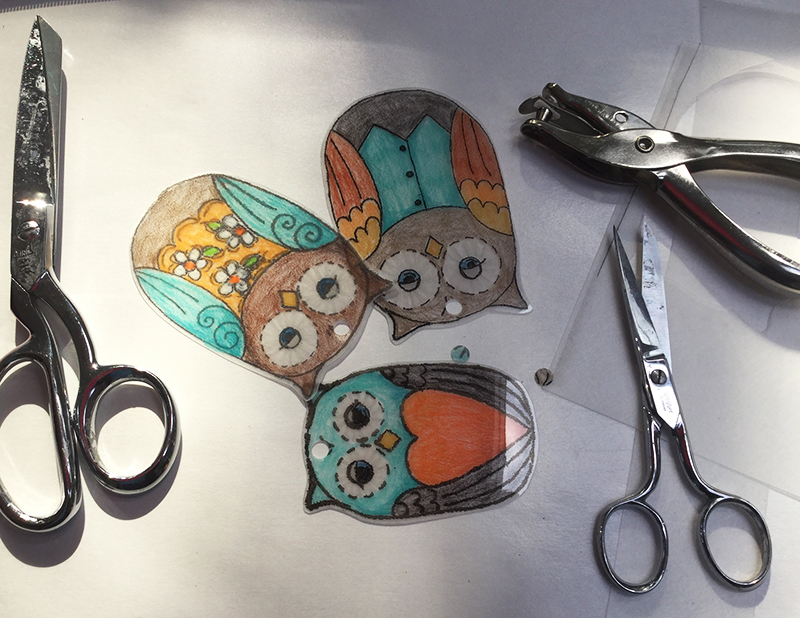
One way to place your design on the Shrinky Dinks is to lay your pattern under the Shrinky Dinks and use a permanent ink marker to trace on your design. You can also use stamps and permanent ink to stamp on a design, or use an ink jet printer. When using a printer allow your designs to thoroughly dry before coloring. I prefer to place my outline on the shiny side and do my coloring on the matte side.


You can color your project with colored pencils, permanent markers or paint. On this project I used prismacolor pencils. Because your project will shrink you do not have to color as heavy as you would normally. Shading and highlighting will show on your finished piece.

Once you are satisfied with your coloring you will want to cut your piece out and add holes. I like to leave a little edge around my design. I used a 1/4″ hole punch, you definitely want to put the holes in before baking.
Preheat your oven to 325 degrees. I put a piece of baking parchment on a cookie sheet and then laid my pieces colored side up with space between them.

Watching them bake is as much fun as making them. I tried to do a video for you, but my oven door glass has little black dots on it that makes it hard to see them baking. (I actually never noticed the dots before). I tried to film them with the door open and it let out too much heat and slowed down the process….so you are just going to have to try it yourself.
When they begin baking the outside edge begins to shrink first and curl up. They begin curling over as the middle begins to shrink. You will want to keep them in the oven until they lie flat.


 This is a before and after picture. You can see how much smaller and intense the color is after the project shrinks.
 I attached my owls with jump rings to a chain. You could also use a jump ring and slip a ribbon through it like my friend Sophia did.


Here are few other fun projects I did, the pumpkin and candy corn is from Amy Mogish’s pattern Halloween Nite and the next pieces are taken from one of Shara Reiner’s books. The last picture has a design I made for a group of ladies from our church that took a bus to Women of Faith. The other piece in the picture is made from a stamp. Some were done with pencils and some with markers. These pieces could just as easily be made into pins, magnets, or book markers.


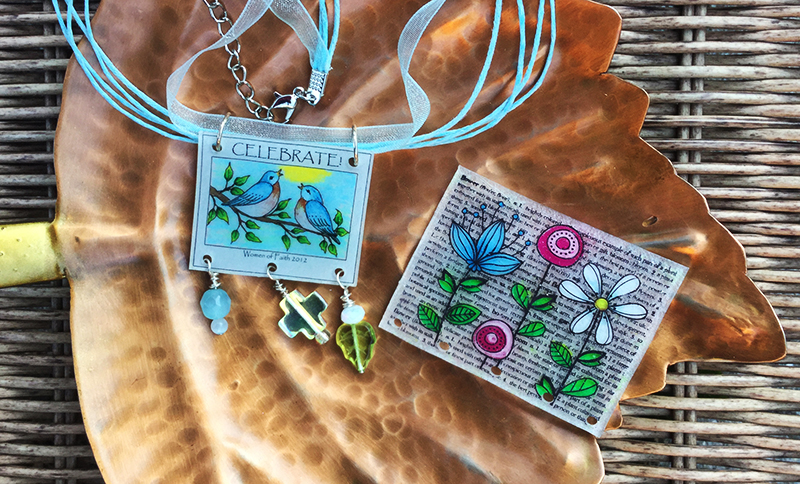
I have attached the pattern for the owl necklace. Here it is as a printable pattern – Owl Pattern (PDF).
I hope you will enjoy playing with Shrinky Dinks, it is fun and you will be amazed at all the possibilities.
Happy Creating,
Jane
So cute!!! I had forgotten about this fun product. Thank you for sharing!
You can do a lot of fun things with shrinky dinks
Ah.. Beautiful design! I’m still waiting for my pack of plastic to be delivered. I can’t wait to start.
Hi Kai, so glad that you are excited about creating with shrink plastic. There are so many possibilities. They don’t take very long to shrink …maybe a minute…once they lay flat leave them in the oven or continue heating with your heat gun for about 30 seconds. I use the oven for larger pieces and my heat gun for smaller things. Kids love seeing them shrink. Have fun and share your creAtions.
I started practicing with a no. 6 plastic container before my shrinkies arrive, and both attempts failed. The first time, I didn’t preheat the oven enough. The next i set the temp too high. It looks so easy in videos hahaha
I have only tried the shrink plastic, but for it you preheat the oven to 325 degrees. I think you will have a lot more success with the shrink plastic.