
Nuthatch Step-by Step:
Painting Tips:
- I like to add sheer layers when painting; it is easier to add more color than to take it away.
- Often when painting birds if there are markings that I would paint at the end, I also paint them on initially. This will give me the placement for the final details.
- When painting birds I do layers of strokes following the direction the feathers grow. I usually start with a small round or 2/0 liner on the first layer, then add the next layer with a smaller liner.
- I usually create my feathers with 2 layers and possibly some shading in between. If you are not happy with your feathers add another darker layer and then a lighter layer of feathers. If it is a dark area add a layer of lighter feathers and then a darker layer.
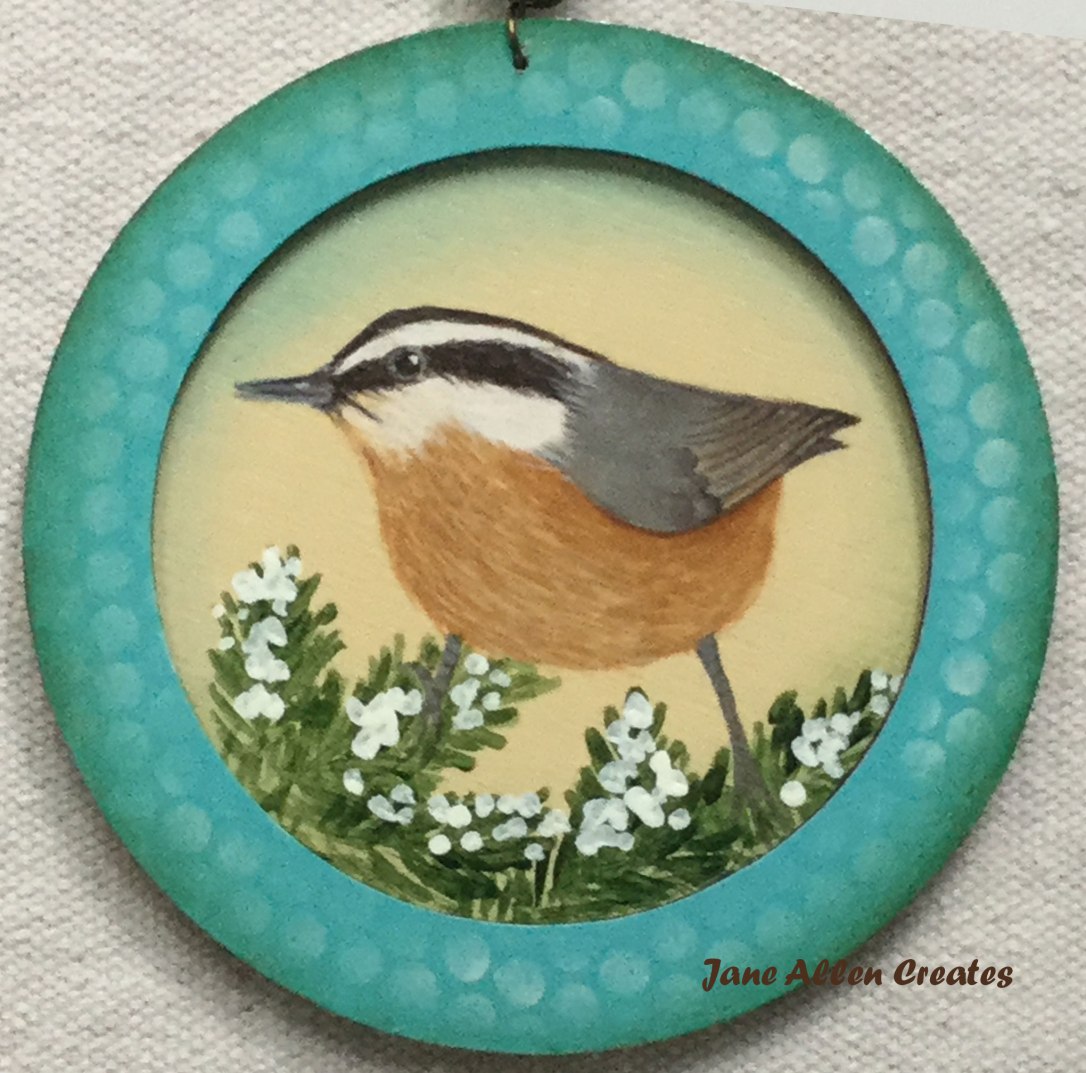
1. Stroke feathers on belly with Burlap. Base eye and stroke stripes of dark feathers with Soft Black. Paint around eye, beak, and wing Slate Grey. Stroke light stripes of feathers with Warm White. Paint lines on wings and legs with Charcoal Grey.

2. Float top of beak and line with Soft Black. Highlight eye, bottom rim of eye and beak with Warm White. Using 10/0 liner and Honey Brown go over belly. Go over white markings on head with Warm White and black markings with Soft Black.

3. Float Raw Sienna under wings. Float Soft Black on back and tail section. Float next to beak with Honey Brown. Paint Slate Grey strokes over legs.

4. Float small feather on back and reinforce lines on wings with Soft Black.

5. Paint wash of Charcoal over back. Add Honey Brown lines and a few Warm White lines on wings. Stroke a few small feathers of Warm White over grey and brown areas and Soft Black in grey.
