
Last Year I tried a new DecoArt Media product call Crackle Glaze. I had used it on a Christmas Tree and also some coordinating ornaments. (See Them Here) It was so easy to use and I loved the results so I thought I would make some pumpkins with it. I started with paper mache pumpkins from my local craft store and painted them Buttermilk, Spiced Pumpkin, and Mint Julep Green and the stems Khaki Tan.


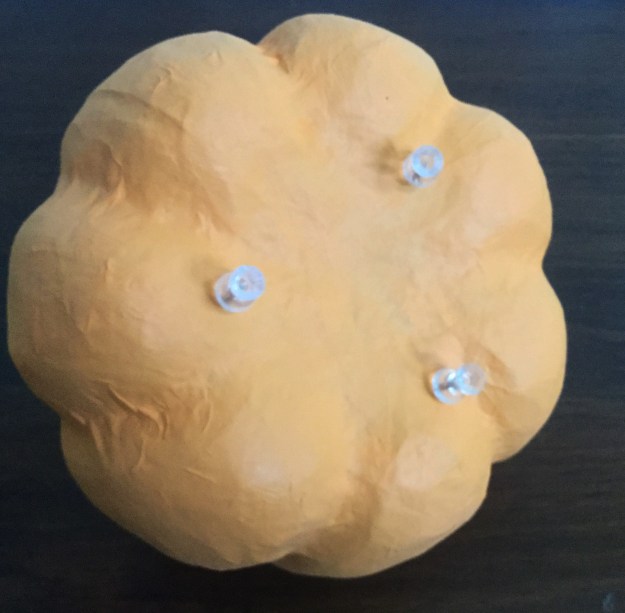
You will then want to give them a coat of Crackle Glaze. I found it works best to cover your entire pumpkin at once or have a defined stopping point. If you try to do an area and then another area the crackle on the area that overlaps will be different (very small crackle). I did everything but the stem and hung it from a basket handle, when dry I painted the stem. On the larger pumpkins I put push pins in the bottom and was able to paint the entire pumpkin starting with the bottom and ending with the stem.

I also found the lighter the coat of Crackle Glaze the smaller the crazing and a heavier coat will give you larger crazing.
Lighter Application/ Smaller Crazing:

Heavier Application/ Larger Crazing: 
The Glazing Crackle dries fairly quickly. Another lesson I learned was don’t try to speed up the drying time by using a hair dryer…….or you will end up with crackle falling off your project. 🙂
Once it is dry apply one of the antiquing cremes ( I used English Red Oxide, Patina Green, and Raw Umber) and allow them to dry. Then wipe off as much or as little as you want with a damp rag. I liked leaving extra in the grooves of the pumpkins. You can work with the creams until they are sealed with a varnish. I finished mine with a spray varnish.
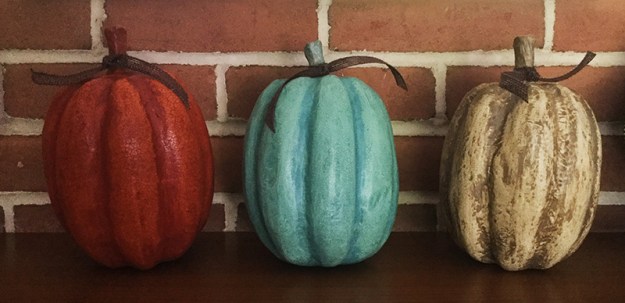

I also did a few other pumpkins starting with Orange Twist, Spiced Pumpkin, and Persimmon. I then used the English Red Oxide antiquing cream on all three and the Raw Umber on the stems. I love how they turned out.


On the one pumpkin I added stars by using the Media Modeling Paste mixed with Metallic Gold Media Acrylics. I used my pallet knife and a star stencil to place the stars on the pumpkin.

I love all the possibilities these products give you. I hope you will give them a try.


If you are looking for other ideas to do with pumpkins check out my blog post from last year Chalk Paint and Gold Leaf Pumpkins.
Happy Creating and Decorating for Fall,
Jane
PS. I am not being paid to endorse these products. I really liked them and wanted to share my joy of painting supplies with you. Hope you will also enjoy them.
These look great Jane!
Thank you Cynthia, they were fun to do!